Tuesday, May 26, 2015

Hotel De Marcey

We just wrapped up one heck of a long weekend that started last Wednesday night. Over the course of the past week we have had 5 different people sleep under our roof and countless visitors stop in to hang out and visit including 6 long distance friends. We played in our annual memorial day frisbee tournament and I nervously got updates of Jack's team at Nationals all weekend. I'm currently laying on the couch nursing a mean whiplash from a layout over the weekend. Must have been a good one :)

It was an exhausting but fun weekend and I just have one picture to show for it. Alison came to go climbing with us and we were accidentally matching.


I think this weekend was just breaking us in for a wild summer ahead. We've got 4 more tournaments on the calendar, a 2 week trip to Europe, a new baby being born inside our friend group, 2 family photoshoots, a one year birthday party to host for our niece, and 5 weddings. Not to mention work gave me a little respite the past two weeks but it's about to kick into high gear! Bring it on summertime! 

Friday, May 22, 2015

Nationals Coverage

Hey Ya'll!
If you're at all interested in following Jack while he's at Nationals this weekend his team puts on a pretty good twitter feed: @seamanultimate or just go to this link: https://twitter.com/seamenultimate

Currently they are playing Cornell and are up 9-6. I'm crawling in my skin with nervousness and excitement!! I so wish I could be there but it would have been impossible this weekend with so much other stuff going on. We'll be hosting and ESPN3 viewing party on Sunday if they make it to Semis so stay tuned!

Wednesday, May 20, 2015

I'm writing this from my NEW office!

That's right!! The office is 95% done! That's a completely arbitrary number...Derrick could probably calculate a real percentage for you so ask him next time you see him. He'll love that. I am so so happy with how it turned out and it's only missing a few tweaks here and there so I'm calling it ready to reveal!

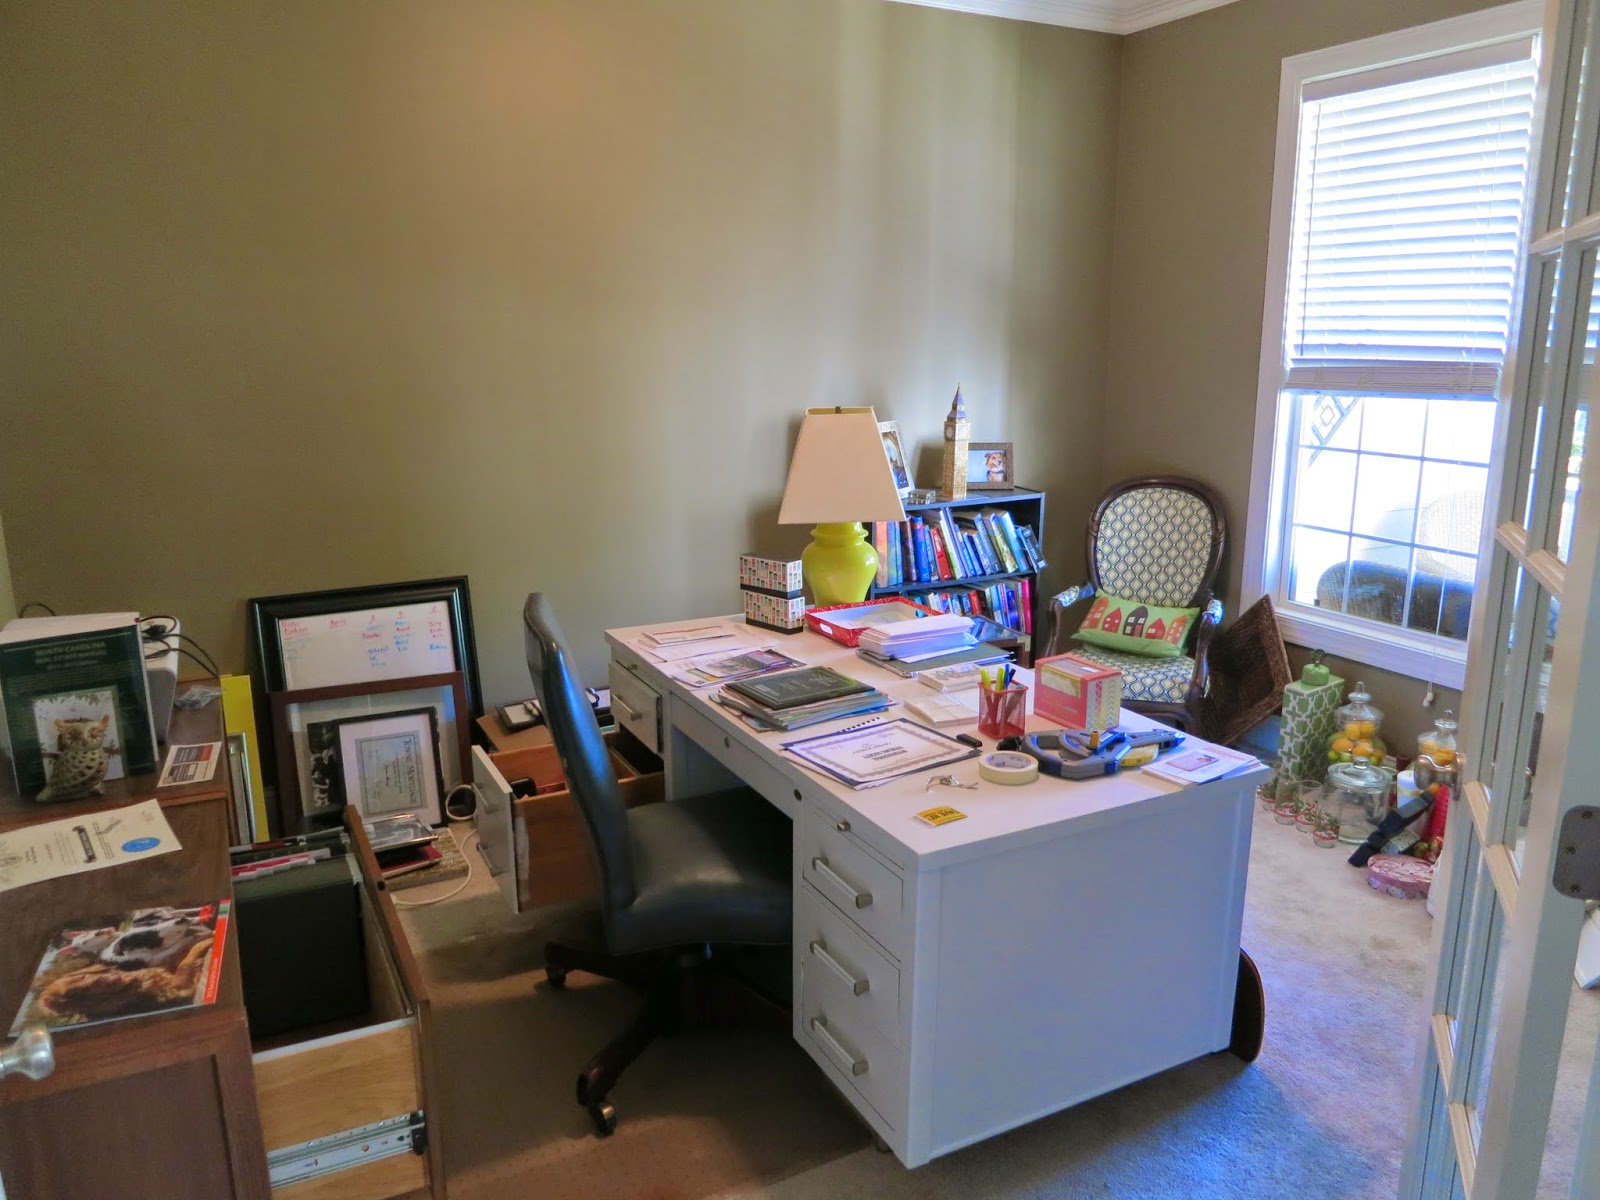
As a reminder, here is what we started with:


So much STUFF! Everywhere! I cleared it all out and only brought back in what I actually needed in the office. The dining room still looks pretty messy but that's for another day :)

Here is is after the makeover! Hope you love it! Sorry for the grainy pictures...I think my camera is getting old :(


Gosh...I feel like these pictures don't really do it justice. It's hard to get a whole room shot. Anyways, I absolutely love it! I was able to make or upcycle almost everything. The most expensive thing in the room is the paint! That was definitely worth it though...I am digging the color!

I think my favorite part are the curtains. This was my first time sewing curtains and I really wanted them to turn out well so I went super slow, measured all of my seams and folded over each hem twice so it looks super finished on the back. Also, a nice surprise, some of my old estate sale thread matched perfectly!


I couldn't decide how I wanted to hang them so I ended up going with these curtain hanger for now. I put a big enough hem at the top to leave room for big grommets later if I want but I actually really like how these look. They are subtle and kind of disappear when you back off of them. Also, the fabric is way less neon pink/orange in person.


This is probably the best photo I have of the curtains and wall color together. The window makes it nearly impossible to get a good shot of them. The light blows everything out. They make a huge statement though.


The filing cabinets turned out great! They match the desk perfectly and look so much better in white! That little printer table was a freebie from my office cleaning out their warehouse. I wanted to hide the shredder so for now I just threw the extra fabric from my bulletin boards over it...I'll either hem it and make it permanent or find a better solution later.


Speaking of bulletin boards, I am thrilled with how these turned out! These were also a freebie at the warehouse clean out. I've had them for months and was just waiting to work on the office. They are actually old cubicle walls. Recognize them now? I have one more if anyone wants it...I thought I'd make three but two turned out to be perfect.


I found a fun neutral fabric and it was just a simple recovering job. I didn't even remove the old fabric. I just laid down a layer of extra white fabric I had between the blue and the polka dots to make sure the white didn't go grey. Then just staples in the back and wallah!  I mounted them with the same hanger that we used for the headboard. Those things work great!


And finally, I created a dry erase board out of an old picture I found at goodwill! It's the stripey one on the right. I wanted a big white board to write my client list on so I could keep up with leads and have a way to sort them by time frame. Whiteboards are ugly though. So, I went to goodwill and found a frame that was a good size and had a glass front. The glass is important, dry erase doesn't work well on plexi-glass. Mine had a picture of this sad little girl on it. Weird.


I took the glass out and sprayed the frame the same gold as my filing cabinet and desk accents. Then I taped off the glass with painters tape. I wasn't too anal about this part, I just tried to keep them the same width as a piece of tape so it would look somewhat uniform.


Then I whipped out the leftover paint from my filing cabinets and gave it two coats of white. This is where I thought it went all wrong. I peeled the tape off and then spray painted it again with gold so that the gold would show up in the unpainted areas. I ran out of spray paint at the very end and it looked super splotchy.


Once I lined it with white tissue paper and stuck it back in the frame though the splotches went away and it looked awesome! Just don't turn it over because she'll be watching you.


Now it's all ready to be filled in with my client list!


I'm totally loving it! I'd still like to get a new light fixture in here and we still need to find the printer cord but other then that I'm probably done for now. It will evolve over time I'm sure and you know it will get more cluttered but I'm enjoying the mess free space while it lasts!


Monday, May 18, 2015

Decked Out

Derrick and I finally had a weekend that didn't include traveling or full day activities so we decided this would be the weekend we started working on the deck. When we bought the house we asked the sellers to replace some damaged wood on the deck. They agreed but in doing so they left 4 pieces of raw wood exposed to the elements and sticking out like sore thumbs.

You can see the one long board (third from the left) here that had been replaced. The two top railing boards were replaced...can't see them in this picture.


 And one board on the stairs was replaced.


So that's what we started with. We don't know if the deck was stained previously or if it was just dirty but we knew that we needed to get something on those raw boards to protect them and figured the entire deck could use a new coat of stain to ensure it was well protected too. Plus, anything new was going to look very different on the old boards compared to the new boards.

So I did some reading, mostly on blogs, and we came up with a game plan. We decided to use these two products:


Basically you use the wood stain and finish stripper first and then you follow it up with the All-in-One wood cleaner. This would get the deck to a state that would be ready for new stain and hopefully look fairly uniform between the old and new boards.

So, that's what we did! We did the stripper on Saturday in the middle of the afternoon. Not a great plan because it was in the 80's and it was difficult to keep the surface of the deck from drying out like the instructions say. Also a bad plan because Derrick was in sweatpants to keep the chemical from burning his skin. Almost effective...he just got 3 tiny burns on his arms.

Derrick rolled the stripper on and I had the hose and misted any dry spots that started to form.


Cros was not happy to be left out but we didn't want those little paws to burn off.


You can kind of see how thick this stuff is. We used a roller to roll it on and get good coverage.


Once it started getting too slippery to walk on we could tell the stain was starting to come up. We had two deck brushes and scrubbed the whole deck down for about 20 minutes and then followed it up with a jet stream to rinse it all off. You could tell pretty quickly that it was working!


Here it is all dried that evening. Much harder to see where that new board is compared to the rest. We did the deck, the stairs, and the top of the railings that were old but we did not do all the slats in between. With the consistency of the stripper I don't think it would have worked as well on a vertical surface plus it would have been very hard to scrub. I think sanding them down and re-applying stain will make the railings blend in well enough, especially if we use a darker stain.


On Sunday we smartened up and got to work at 8:30 AM before it got really hot. It made a huge difference. First we wet everything down.


Then I mixed a 50/50 solution of cleaner and water into our new pump sprayer and Derrick sprayed the deck down with it.


I did another coat and then we got scrubbing. You're supposed to let it sit for about 15 minutes, scrub, and rinse.


And here she is after the cleaning and time to dry.


 I don't see a huge difference between the stripping step and the cleaning step but we could definitely see some gunk getting removed with the cleaner and I don't think the cleaner could do anything but good so I'm glad we did it.

The plan is to stain next Monday so hopefully the weather will cooperate!


Friday, May 15, 2015

No More Water!

The black thumb is a real thing! Turns out I did not get my father's gardening genes as I had hoped. I didn't get my Mom's either because she's good too. I got some DNA mutation which gives me a black thumb apparently. Did you know you can give your plants TOO MUCH water?? Probably not possible for you but I am guilty of plant homicide by drowning :(

Remember my beautiful mailbox bed? Made with Blood and sweat and tears?


And then I added this beautiful mandevilla that was going to add big, beautiful, pink flower behind the mailbox.


Wow....and now that I've seen that picture again it makes this one look even more pitiful...


Holy cow....I did not realize it looked that terrible. I mean I knew it looked like death but I did not notice the extreme change in it. Now my thumb feels blacker... 

So apparently I drowned it. Right after I planted it we got a TON of rain. Read buckets and buckets of rain poured down on Raleigh. No problem! Plants love rain! This is great! Well then it stopped raining and I continued to dump buckets and buckets of water on it. Seriously...buckets...my hose isn't long enough and I don't have a watering can. 

So when I finally noticed it wasn't doing so hot, which was probably much later then it should have been, I called my Dad. Dad asked about my watering schedule and suggested I might be drowning it. He told me to dig a little moat around it and see if the soil was wet. The soil wasn't wet, it was completely flooded. I would take a shovel full of mud out and the hole would immediately fill with water...it was pretty bad. So this is how it looks now. I pulled as much mud and water out as I could and laid it out around the hole to dry out. Then I filled the hole with half a bag of miracle grow that I had left over and I haven't touched it since. I'm hoping it will bounce back. 


My other plants don't seem to mind the water too much at all! To be fair, I'm not sure what this one is supposed to look like so if red is a sign of drowning these are going down the tubes too but at least it's less noticeable to the neighbors :)


My lovely succulents are doing amazing though! They've doubled in size and are starting to turn pink around the edges. Apparently I am amazing at growing anything that takes as much effort as a cactus. Go me!


Any other words of advice for my poor mandevilla? We might give it another week and if there is no sign of improvement we might call it dead and replace it. We shall see!

Tuesday, May 12, 2015

Office Progress

We've been making progress in the office over here. Thank goodness because our dining room is currently buried under the entire contents of our office. I finally chose a color.

First off, here is where we started. Brown. We have 4 shades of brown paint within view of our foyer so the brown had to go.


Here it is after a coat of primer.


 Let me show you my inspiration picture first. It's from this website. I want our house to be fun and filled with personality but I also don't want it to be crazy. I thought this green was so well done and it originally had me sold on green. I have a white desk and pictured white filing cabinets and brown and black accents like seen here.


Well, then came the challenge of matching that green from the picture. This website gave a mix formula for Sherwin Williams but not a sample size. When I decided to just go for it and get a gallon the formula was so large that it would have overflowed the can and Sherwin Williams ultimately said they couldn't make it. Apparently it was created by someone just going back and adding a little of this and a little of that over time and the formula got crazy.  So, I tried to match it with paint swatches. Neither was right. The one on the right was too dark and the one on the left was very flat in person.


At this  point I was second guessing the green so I got two more samples. One was my last attempt at green and the other was a color I pulled from Young House Love's old house. Plummage by Martha Stewart. I actually loved both of these colors and the picture doesn't do either one of them justice. The green is super cool and poppy and the blue has kind of a teal green base.


Ultimately I went with Martha Stewart's Plummage. I decided it would be easier to decorate around and still be a great statement. Derrick helped me with the first coat two weekends ago and I finished the second coat last week.


It's a little greener in person and I love how it looks with the white trim and white french doors. Now I just need to finish painting the filing cabinets which will hopefully happen today. They've been occupying my side of the garage for the last week and a half. I've got one more coat to go!


Wednesday, May 6, 2015

New Student Orientation

The blog title could also be Crazy Eyes Crosby Visits NCSU!

For our anniversary this year Derrick and I have been trying to find a weekend to get out of town and go to Boone for some hiking. So far we haven't had any luck...things keep popping up so it may or may not happen at this point. We still wanted to do something for our anniversary though and it conveniently fell on date night anyway so we opted to re-live our engagement day and play some disc golf on NC State's campus.

We started with picking up Snoopy's and picnicking in Pullen Park. On Engagement Day we didn't eat until after the proposal and after all of the excited phone calls were made so the only thing open at 10 PM was Taco Bell. We thought about it for a second but Snoopy's $1 hotdogs was a clear winning substitute.


We started at the bell tower and alternated choosing holes to aim for. We stalled out when Derrick chose the dumpster...Derrick underestimated the perfect accuracy of my throws and my frisbee disappeared under the dumpster for about 20 minutes while we hunted for sticks and scraped up our hands trying to fish it out. Shouldn't every anniversary include dumpster diving?


It was fun to tour around our old stomping grounds and take Crosby to all of the iconic NC State sights. Like the Court of Carolina:


The wolf ears:


If you squint you can see Crosby mid-air catching her frisbee.


The brickyard:


And the belltower:


Happy anniversary to my love! I loved re-living our perfect proposal!